
This page takes a fresh WooCommerce store to working weight-based shipping rates: install the plugin, give the products weights, add the shipping method to a zone, adjust the starter rules, and see the result at checkout. It takes a few minutes, and nothing here is permanent — rules are easy to change later.
Step 1 Install the plugin
If you have the Pro edition, install the package from your purchase email: Plugins → Add Plugin → Upload Plugin, then activate it. Otherwise search for Weight Based Shipping under Plugins → Add Plugin and install Weight Based Shipping for WooCommerce from WordPress.org. Either way, nothing changes for your customers yet: the plugin only starts producing rates once you add it to a shipping zone in step 3.
Install one edition, not both — see Free vs Pro for the three-step procedure. The two editions are the same plugin in different packages, so only one of them runs at a time: activating one deactivates the other and says so in a notice. Nothing is lost either way, but it is tidier to remove the copy you are not using.
Step 2 Give your products a weight
Shipping rules are only as good as the weights they read. Open a product, then Product data → Shipping, and fill in the Weight field. Variable products carry a weight per variation, with the parent product's weight as the fallback. A product with an empty weight field counts as zero, which quietly makes carts lighter than they really are — the most common reason a rule does not match.
The number you type is in the store's unit, set at WooCommerce → Settings → Products → Weight unit. Your rules will use that same unit, so decide between kg, g, lbs, and oz now rather than later. Product weights and units covers bulk editing, virtual products, and what happens when you change the unit.
Step 3 Add the shipping method to a zone
WooCommerce decides where you ship; the plugin decides how much it costs. Go to WooCommerce → Settings → Shipping, open a shipping zone (or create one, for example a zone covering your own country), click Add shipping method, and pick Weight Based Shipping from the list.
Then click the new method to open its rules editor. If you are not sure which zone to start with, start with one broad zone; Shipping zones and the global method explains the zone-matching rules and when a global method is the better fit.
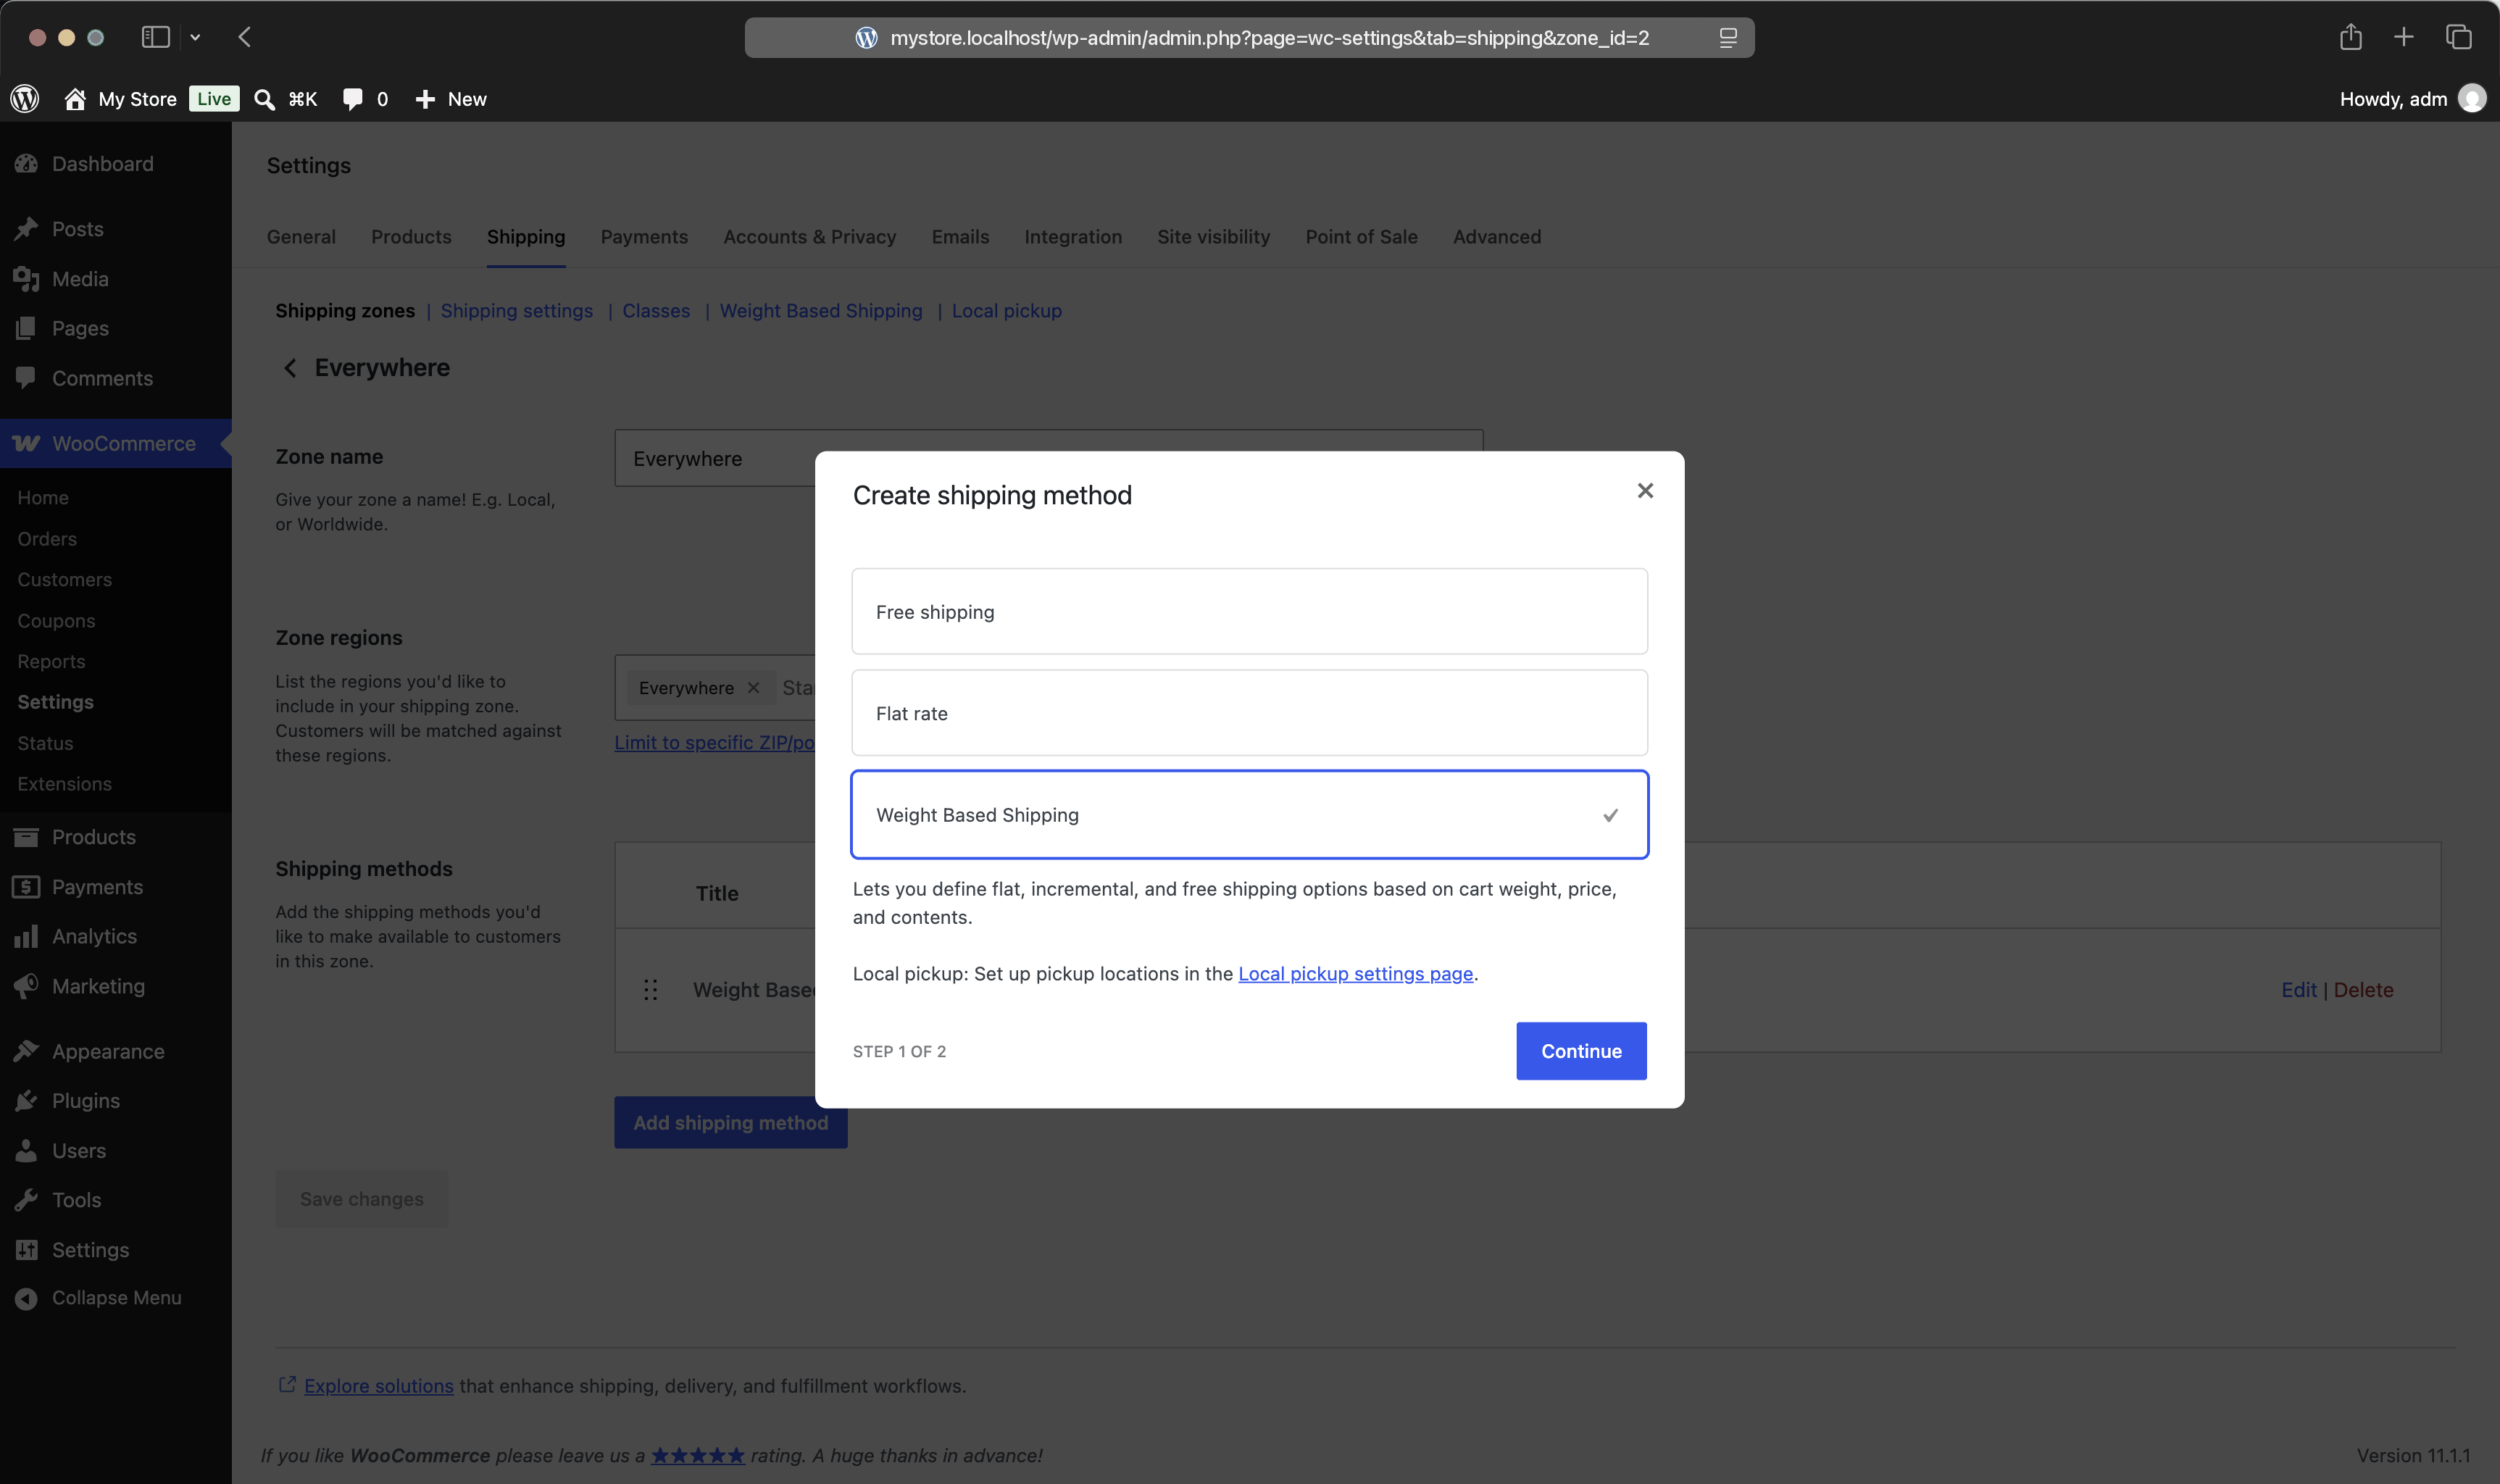
Step 4 Adjust the starter rules
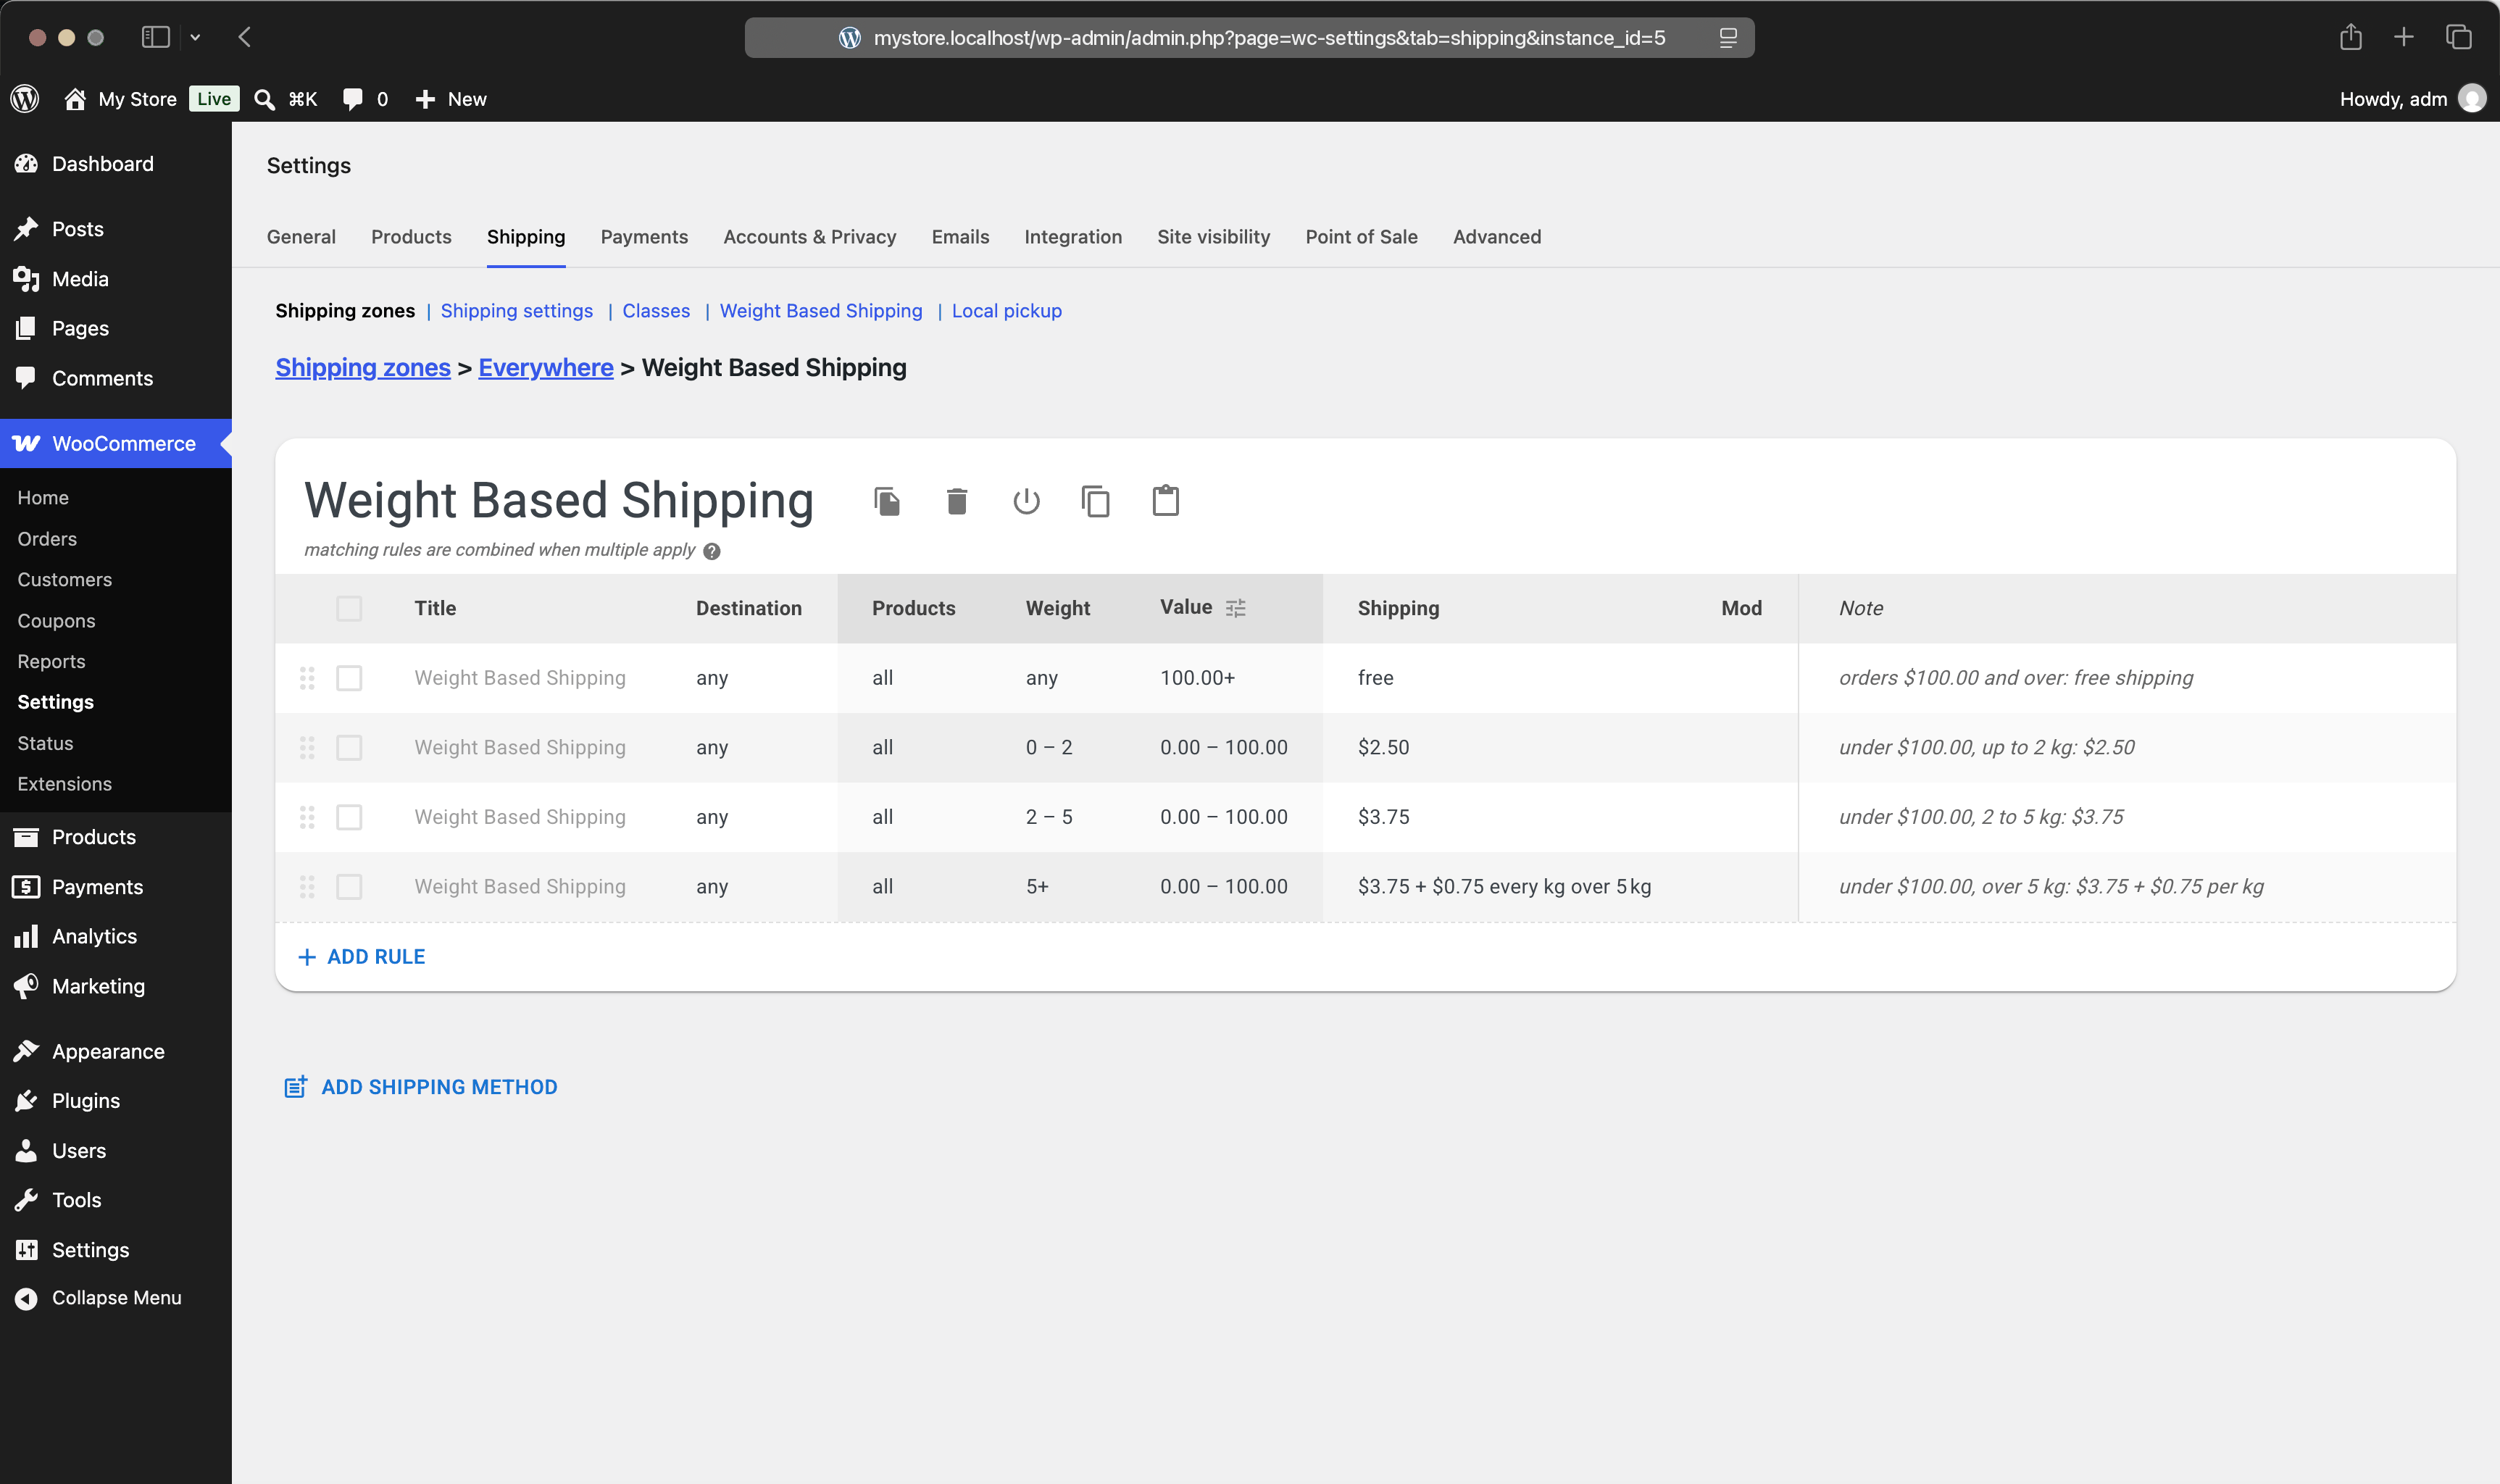
A brand-new method does not open empty. It comes with four rules that already describe a reasonable price list, so you can edit numbers instead of inventing a structure:
The starter table
Orders $100.00 and over: free shipping.
Under $100.00, up to 2 kg: $2.50.
Under $100.00, from 2 to 5 kg: $3.75.
Under $100.00, over 5 kg: $3.75 for the first 5 kg, plus $0.75 every kg over it.
Click any cell to edit it. The Weight and Value cells open a range editor with a from and an up to (excluding) field; the Shipping cell offers free, flat, and per-weight prices; the Note column is a free-text reminder for yourself that customers never see. Nothing is saved until you press Save changes, so experiment freely.
Editing a rule is the same three moves every time: click the cell, change the value, press OK. Here a weight bracket is widened from 5 kg to 6 kg and the change is saved.
Step 5 Check it at checkout
Add a product to the cart on your site, open the checkout, and enter an address inside the zone you configured. You should see one shipping option titled Weight Based Shipping with a price from the table. Change the quantity and watch the price move between brackets. Work from the checkout rather than the cart page: the block Cart has no address fields and lists only the first option.
Two things are worth knowing while testing. WooCommerce caches shipping rates for the duration of a visitor's session. Saving your rules clears that cache, but editing a product's weight does not, so a test cart can keep showing the old price. Turning on WooCommerce → Settings → Shipping → Shipping settings → Enable debug mode disables the cache while you work. And if no rule in the table matches the order, the method offers nothing at all rather than offering zero, which is why the starter table ends with an open-ended rule.
Nothing at checkout? Work through Troubleshooting — it is almost always a zone that does not match, a missing product weight, or a gap between weight brackets.
Where to go next
Read How rules work once: it is the single page that explains why a table behaves the way it does, and it saves a lot of trial and error. For a specific pricing model, pick the matching guide from the shipping recipes — rates by weight, by country, by product group, or free over a threshold.